How to add a custom logo to a Grandstream phone
In order to add a custom graphic to a Grandstream phone you need the following programs:
Xml notepad 2007
Some kind of photo editing program.
PumpKIN http://kin.klever.net/pumpkin
Base 64 encoding program
The purpose of this guide is to add a simple graphic to the Granstream phones instead of the grand stream logo. This will only work for Grandstream GXP 2100 series. If you want to apply this guide to other Grandstream phones it will require different basic configuration file. The configuration file and logo are attached at the bottom of this page.
Step 1: work on graphic
The graphic needs to be pure black and have a 1 pixel depth, this can be done in Microsoft paint. The screen size is 130x65 pixels so the graphic must be that size or smaller otherwise the phone will drop the screen configuration. Finally you need to save the file as monochrom bitmap format. If you want to keep any of the buttons and just replace the Grandstream logo a size of about 80 x 40
Attached is a copy of the logo I used for my screen to give you an idea of what it will look like
Step 2: encode image
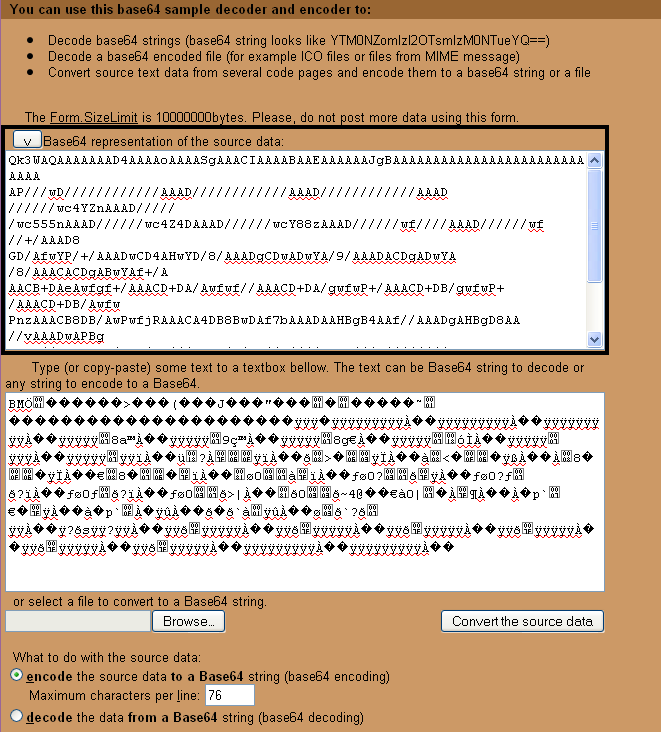
http://www.motobit.com/util/base64-decoder-encoder.asp
You can use the above website to translate the graphic
Browse to the graphic
Check the encode box
Convert the data
You will have an output like the one above copy the top boxes data and paste it into a notepad document. Save the encoded graphic for later.
Step 3: Edit Xml file
I have attached a copy of the grand stream default Xml configuration. We will modify this file with notepad XML to change the screen.
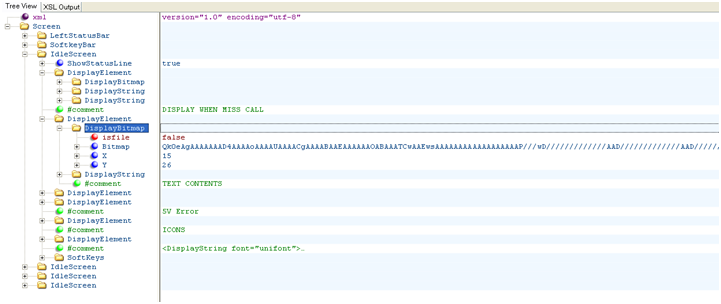
Under the first idle screen folder is several display elements folders. Within each display elements folder is a display bitmap folder. We are looking to the display bitmap that contains a path to app/resource/logo/gs_logo.bmp
Change the isfile attribute of the bitmap folder to be false.
Replace the path to the grandstream logo with the base 64 output you copied into a notepad document earlier.
The final product should look somewhat like the screen shot.
The X and Y under the logo subdirectory control where on the screen the logo is placed you can play with these values to get the logo where you want it. I have them set for X= 15, Y= 26
Save the file changes
Name the file gs_screen.xml
If you don’t name the file that the phone will not find it.
Step 4: have the phone directed to your computer
Find the ip address of your phone and type it in the web browser to access the phones options. The default password is admin.
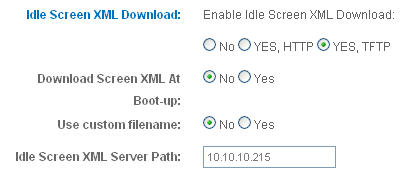
Under the settings tab go to advanced settings set the following settings
Server path should be the ip address of your computer. Typing ipconfig into the command prompt will tell you what the ip address of your computer is.
Update and reboot the phone.
Step 5: Tftp the graphic to the phone.
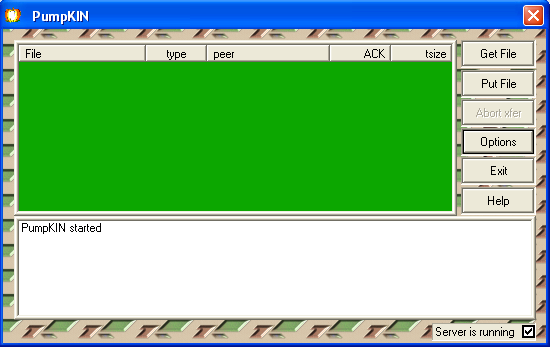
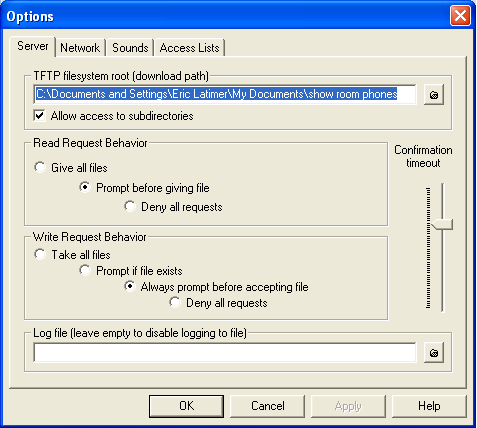
Open up pumpkin
Click on the options button
Point the phone to the folder that holds the Xml File
On the phone go to Download SCR XML, This option is under the preferences option menu
If you followed this guide through than you will see a logo on your phones screen. This guide is for the moderately technical savvy person. If you find yourself overwhelmed ABP tech can help you out. Here is a link to our support page http://www.abptech.com/support/
Get Link for XML file: https://web.abptech.com/download/grandstream/gs_screen.xml


